Uncategorized Archives - Page 5 of 13 - Lasiter & Lasiter Plumbing


January 20, 2020by Lasiter & Lasiter

hot water heater

Checking Your Water Heater During the Summer Months

The summer months are the last times when you’d consider how well your water heater works. But, you need to be prepared for when the fall and winter seasons come along once again.

You can ask us at Lasiter and Lasiter Plumbing to help you in finding a solution that ensures your toilet stays functional. We can repair and replace water heaters in homes throughout the DFW area.

Look For Signs of Wear

Check for any rust or corrosion around your heater. These forms of wear are signs that you might have to replace your water heater. Rust could get in your hot water supply. The worst part is that rust and corrosion are often next to impossible to clean.

How Old Is Your Heater?

You should think about how old your water heater is, as an older one will need replacement. A heater that is at least ten years old might need replacement altogether.

You can review the serial number on your water heater to see how old it is. Look at the first three points on the number. You should see a letter and two numbers. The letter refers to the production date corresponding to a specific month based on order, and the numbers are for the year the heater was made. For instance, “K12” means November 2012, while “B04” is February 2004.

Check on the Water Condition

You can test the quality of your water from your heater to see how well it looks. You’ll need to replace your heater if the water appears rusty or worn.

Look At the Underside

Check the area underneath the heater to see how it looks. The area should be dry and safe, but a leak can cause the area to become damp.

You might need a flashlight to review this part of your heater. The area might be tight to physically access, but an extra bit of light will help you identify whatever is in your area.

Listen For Noises

You might also need to listen for any noises coming out of your heater. Unusual noises coming from the heater are signs that there is an excess amount of sediment building up in your tank.

The hardened sediment can cause banging and rumbling sounds to develop in your heater. The issue means that your tank will not be as efficient as usual. The design may not handle as much water at a time as it should. It may also be more comfortable for leaks to develop throughout your tank if there is lots of sediment building up all around.

Everything that you can do for your water heater can influence how well it functions. You can consult us at Lasiter and Lasiter Plumbing for help with your bathroom if you ever have any concerns. We can help you in finding out what needs to work for your heater. We can also replace your radiator if the need arises.


January 14, 2020by Lasiter & Lasiter

Sweaty Toilet

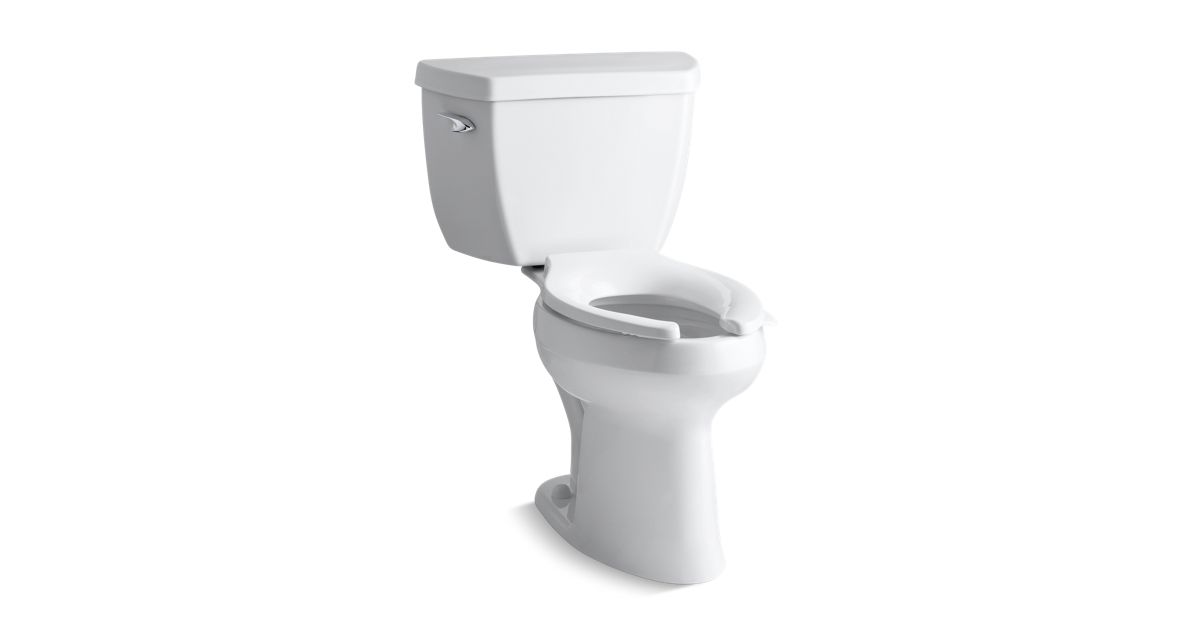
How to Keep a Sweating Toilet Under Control

A toilet will naturally develop condensation. The condensation occurs when the outside part of the tank is cooler than the air surrounding the area. As the tank fills with cold water, the tank cools down. The atmosphere in your home will be warmer on average, thus making it easier for the toilet to develop condensation.

While most forms of condensation are minimal and will not impact your bathroom, an excess amount can cause water damage around your property. There are a few things that can work to prevent the sweating from being more of a threat than necessary.

Use a Mixing Valve

A mixing valve applies hot water from your home into your toilet. The hot water mixes with the cold water, thus reducing the risk of condensation. The effort works best if you have easy access to a hot water line in your bathroom.

Review How It Fills

Sometimes your toilet might be filling up with more water than necessary. A valve issue might be what is causing the problem. You can repair the valve to fix the toilet and keep it from taking in excess water.

Find a Useful Fan

Sometimes the way how the air circulates can be a point to note. A new bathroom fan can assist you in keeping the air around the room under control. A fan can help you move air around without being too hard to handle.

You could also consider taking shorter showers or leaving your bathroom door open to keep the air from being too stuffy. You can allow the air around your bathroom to move through well.

Install a New Toilet or Tank

You might have to get a new toilet ready in your home if you are struggling to fix your old one. A new toilet would be necessary for ensuring the condensation threat won’t be a burden.

In other cases, you might not be able to replace the entire toilet. You might only be capable of replacing the tank. In that case, you’ll have to choose a tank that features an insulated body that can handle the water well.

Is It a Leak?

The last thing to consider here is whether or not there’s a leak in the toilet. There is a chance that your toilet might develop a leak for many reasons. But excess condensation around your toilet does not mean there’s a leak inside the toilet. Still, the condensation might hide the issue and keep it from being visible. Our experts at Lasiter and Lasiter Plumbing can check on how your toilet is working to see if there’s a substantial problem that needs correction.

Have Us Check Your Toilet

All of these solutions are suitable for fixing a sweating toilet and preventing water damage. You can ask us at Lasiter and Lasiter Plumbing to assist you in checking the condition of your toilet. We can find the issue at hand and then follow through with a suitable change that fits well and keeps your toilet functional and safe for use.


January 9, 2020by Lasiter & Lasiter

Test Your Toilet

Steps For Testing Your Toilet

Your toilet might have some leaks that you will need to fix. A leak can be tough to find, but it can make it harder for your toilet to work as well as it should. It may also cause stains in your bathroom and use it more water than you expect, depending on the setup.

You can test your toilet from your home to see if it is working accordingly. There are a few steps that should work when getting your toilet ready for use.

Note: Implement this step well after the last person went to use the toilet. You can do this to get a more accurate readout over how well your toilet is functioning.

1. Remove the lid from the tank

The underside part of the top may include condensation. The moisture will drip as you remove the cover, although this is a natural part. You should not expect an excessive amount of condensation in most cases, although an elevated total could be a sign that the water going in and out of your toilet is too intense or hard to handle.

2. Review the water level in the tank

Check on the water line for your toilet. You might have to adjust your toilet depending on where the water is under the line. The fill valve is not working well if the water level is over the edge. You might also have to replace the inside diaphragm if this segment is showing wear.

3. Drop a coloring into your tank

A dye tablet from a water provider may help, although you could also add a few drops of food dye in your tank.

4. Wait to see how well the coloring works

It takes about fifteen minutes for the coloring to go through the water all the way. Do not flush before it goes through, or else the test will not be useful enough.

5. Review the water in the bowl

The color from the dye or tablet should not appear in the pot. If there seems to be something inside the container, that means there is a leak. The intensity of the leak will vary based on how much of the dye got through.

6. Ensure the flapper valve works

You might have to replace the flapper valve in your toilet, as the valve can stop the leak from becoming worse. The flapper should meet the standards for operation in your toilet.

One idea to consider is to look at how much sediment or other debris has entered the flapper. You will have to clean everything up and then test the toilet again to see if the problem is still there.

You’ll have to be sure you look at how your toilet is working if there are any concerns over how it operates. You can ask us at Lasiter and Lasiter Plumbing for additional assistance in getting your toilet fixed well. We can check on every part of your toilet and figure out a plan for fixing the plumbing issue before it can become more of a concern.


December 28, 2019by Lasiter & Lasiter

water leaks

What Causes Leaks to Develop In Your Home?

Water leaks can be annoying and tough to find around your home. These leaks can keep your water system from functioning correctly. It may be time for leaky pipe repair services.

Your water bills may also rise, as you are using more water than necessary due to all that water flowing out of your setup. Multiple points can cause leaks to develop around your home. You’ll have to consider these places if you find any problems surrounding how well your water setup functions.

Seals Breaking

A seal is a material that goes over your pipes and connectors in your plumbing setup. Seals will prevent water from coming out, plus they keep the connections in place. Those seals are not going to last forever, as the pressure from your water setup can cause them to wear out. Eventually, you will develop a leak from one of these seals.

Corroded Pipes

The pipes around your plumbing setup may also develop corrosion. The corrosion occurs when minerals and other items go through your pipes. The worst part about corrosion is that it can come from minerals well outside your property. Sometimes the natural aging process will make the concern harder to manage than you might expect to find.

High Water Pressure

Water pressure levels in your home can be a threat. While you might enjoy high pressure in your shower, that excess pressure can become a problem if not handled well enough. Your plumbing system will develop fatigue from all that pressure. The wear can cause your pipes and seals to break apart faster than what you might expect.

Outside Trees

Tree roots are necessary for supporting trees, but they can also harm your plumbing setup. Roots can break apart your pipes and cause them to shift after a while. In some cases, a leak is identified by noting wet spots and excess grass growth in certain areas. These are places where leaks might develop due to tree roots encroaching on your space.

Temperature Shifts

Significant temperature changes can be a problem. Your pipes can expand and contract when the weather conditions change throughout the year. These shifts can be a problem that needs repair as well as possible before anything significant can get in the way.

Worn Connectors

Check the connectors in your plumbing system. Water connectors can wear from shifting and can produce leaks. You might notice this in cases where your washing machine or other appliances in your home start to move and wear out. Such damages can be hard to cover and maintain, but they can make an impact on your plumbing setup if you do not take care of them soon enough.

All of these threats can cause leaks in your home’s plumbing system and cause you to use more water than what you want to utilize in your home. But you don’t have to worry, as you can contact us at Lasiter and Lasiter Plumbing for help with fixing your plumbing setup and with correcting any leaks that develop.


December 22, 2019by Lasiter & Lasiter

how plumbing works

Sudden Temperature Changes Can Harm Your Plumbing System

One of the most common concerns we come across here at Lasiter and Lasiter Plumbing entails damages to plumbing systems caused by temperature changes. It is one thing for a home to go from hot to cold water on occasion for showering or washing. But after a while, all those temperature changes can negatively impact your plumbing system. You could experience leaks or other concerns that keep your plumbing setup from working as well as it should.

What’s even worse is that the weather outside can create even more significant temperature changes. With the weather conditions in the DFW area often being hot in the summer, it can become easy for plumbing fixtures to adapt to those intense conditions. When the temperature cools off, the plumbing setup will revert to its original state, thus creating more damage.

Damage Happens Slowly

The harm to your plumbing setup can be gradual, and it may take years for the most significant issues to develop. But all those temperature shifts can create leaks, dislodged pipes, and rusting. You can contact us at Lasiter and Lasiter Plumbing if you ever come across these problems.

The issue in question develops through the following steps:

  1. As the temperature increases in your plumbing setup, the pipes will expand. They will expand in size in response to the intense heat and pressure created by hot water.
  2. When the temperature drops, the pipes will contract. They will act after the plumbing setup becomes intense. The contraction causes the pipes to become still from the fierce cold.
  3. As the temperatures in your setup continue to change and adjust, your plumbing setup starts to shift itself. Your pipes might start to become loose, or they could crack. The impacts will occur depending on the changes in temperature and how quickly they develop.

These harmful changes can be challenging to maintain and control, but they can cause some harm to your setup if you are not careful enough. It can be challenging to prevent the issues from developing, as you will have to use hot or cold water for various purposes. In some cases, the weather outside will make this an issue that you cannot avoid.

Monitor Your Plumbing System

The best thing you can do here is to monitor your plumbing setup and to see if you ever notice any changes that might occur. You should look for leaks or cases where your water is not moving out as well as it should. These could be signs that your plumbing system is impacted by the significant changes in temperatures around your structure.

Call the Best Plumbers in Fort Worth, TX

You can ask us at Lasiter and Lasiter Plumbing to help you with fixing plumbing problems if you ever come across them. We want to see that your plumbing setup is secure and will not be harmed by the changing temperatures that might develop. We will assist you with all the unique needs you might have for your property, so whatever you have will be fixed, no matter what the temperature might become.


December 12, 2019by Lasiter & Lasiter

hard water vs soft water

Hard vs. Soft Water – Is There a Difference?

We at Lasiter and Lasiter Plumbing can check on how well the water feels in your home. We can identify if you have soft or hard water. But what makes the two different from one another? What is appropriate for you to consider when finding something for use in your home?

Hard Water

First, let’s look at what makes hard water distinct. Hard water is a form of water that has dissolved materials in its body. These include magnesium, lime, and calcium. Those minerals have dissolved to where the water can produce spots around glasses, sink surfaces, and other items it touches.

The water collects these minerals as it travels through the ground. Rainwater is naturally soft, but it will collect minerals as it moves through the land and eventually towards a water source.

Some people prefer hard water because they like the taste a little more. Others enjoy how the rain contains naturally occurring minerals that are essential to a person’s health.

But at the same time, hard water can wear out clothes and leave spots and residues on dishes and glasses. Soap scum can develop around bathtubs and showers due to hard water.

Soft Water

Rainwater is considered soft water since it doesn’t contain any chemicals. But, soft water is treated to where sodium is the only ion.

Soft water is treated through a solution in a water treatment facility or a home setup. A lot of people turn to salt blocks to produce soft water.

Many people don’t like the taste of soft water. They often find the water to be too salty. But soft water may be more suitable for chores. The water will not leave spots or add undue fatigue to clothes. Soft water does not add lots of wear on home appliances, not to mention it may keep those machines from using excess energy.

Soap lather is also more noticeable when using soft water. Hard water will not produce as much soap, what with magnesium and calcium producing a less effective reaction.

What’s the Best Choice?

The option for water in your home should be at your discretion. But you have to think about what you use water for in your home when figuring out what is appropriate. Soft water is useful if you have modern appliances and if you have lots of indoor work that requires plenty of water.

Meanwhile, hard water is useful if you need to cook often and if you’re okay with the visual effects. You can always use white vinegar and baking soda to clean the spots off of your glasses and dishes. But hard water can harm some appliances, so be aware of this point.

You can contact us at Lasiter and Lasiter Plumbing if you have any concerns surrounding how well your water is working. We can check on your water and plan a suitable effort hardening or softening your water, depending on what you would prefer us to do for your home.


December 2, 2019by Lasiter & Lasiter

Sink Cleaner

How Are Spots on a Sink Cleaned Out?

The spots that develop around a sink can be frustrating and annoying. But they don’t have to be a burden if you have someone who can help you remove them. Our experts at Lasiter and Lasiter Plumbing can assist you in removing all those spots. Those spots can be tough to clear out, especially since many traditional cleaners won’t clean them out as you might wish. But we will give you our best effort to clean them out with an alternative method that is much more efficient.

What Are These Spots?

To understand how these features can be cleared out, you have to note how well these can form. The spots that develop around your sink are mineral deposits. Your water may contain calcium, lime, and other minerals that can build up after a while. Those materials can build up around your sink, especially your drain. They form when the tap water around your sink evaporates.

Mineral deposits can form on sinks of all sorts. But you’re more likely to see them on stainless steel sinks than you are to find them on white sinks. These spots can be extremely annoying and bothersome, but they don’t have to stick around forever if you know how to clear them out.

How Do We Clean Them?

We at Lasiter and Lasiter Plumbing can assist you in cleaning off even the most stubborn mineral deposit spots around your sink, shower, or elsewhere. We can use safe cleaning materials to clear out whatever might become dangerous. White vinegar can work as a helpful base, for instance. White vinegar is an acidic compound, but it does not become abrasive or rough on sink surfaces.

There may be cases where the spots are too intense to where they aren’t being cleared out through traditional means. In this case, a combination of vinegar and baking soda may work. These two produce a reaction that foams and can lift out some of the toughest stains around.

No Harmful Chemicals

The most considerable part of our cleaning effort is that you’ll remove those annoying spots without using harmful chemicals. Traditional sink cleaners can leave residues around your sink. The chemicals in these cleaning materials can produce those streaks, not to mention they can leave off unfavorable odors that are hard to clear out. You’ll have to find something safe to use, and we can help you with that point.

It won’t take long for us to clean these stains. You won’t have to leave your sink alone for a while to let it dry or do anything else. We’ll ensure the sink is cleaned out well without harming the surface in any way.

The Fort Worth Area Plumbing Experts

You can ask us at Lasiter and Lasiter Plumbing to help you with cleaning your sink and other surfaces. Our work will safely clean out all those mineral deposit spots from your surfaces, not to mention you won’t bear with annoying streaks or odors. You deserve to have a more excellent solution for your sink without trying to scrub everything down in vain.


November 27, 2019by Lasiter & Lasiter

Plumbers Putty

Is Plumber’s Putty That Useful?

Are you considering using plumbers putty? While plumber’s putty should appealing in theory, it can be more difficult for you to handle than what you might expect. You’ll have to look at a different solution for when you’re aiming to get your plumbing problems fixed correctly.

What Is It Made Of and Use?

Plumber’s putty is a soft mold that sets in on various plumbing materials. It works well with stainless steel materials and multiple types of fixtures.

It’s great for many situations, including controlling leaks. It can also help with producing seals in many forms. The seal is ideal for drains, faucets, and other features that might leak if not managed well.

What Is the Issue?

While plumber’s putty may seem appealing for use, many problems make it harder for the compound to work. Plumber’s putty can stick on a surface and may be difficult to remove. The question is concerning for cases where corrections or other fixes are needed.

The putty is not necessarily going to last for a while, either. The putty can wear out over time. It may develop condensation and wear just like everything else in your plumbing setup. The problem can become significant and worrisome depending on the quality of the material.

Also, plumber’s putty may cause stains around your pipes and other metal features. The dyes can cause the materials to wear out and weaken prematurely.

Can It Get In Your Water?

It would be difficult for a plumber’s putty to enter your water supply. It’s applied to the exterior. But there is always the potential that an issue becomes more significant. A leak could spread and become more substantial after a while. The possible damage that comes from the putty

What Should I Do?

You don’t have to use plumber’s putty to fix the problems around your plumbing setup. You can ask us at Lasiter and Lasiter Plumbing for help with your work needs. Our team at Lasiter and Lasiter can review the situation at hand and find a solution that fits.

Avoid the Headache and Call the Plumbing Experts

We can check on the situation at hand and find an appropriate material that you can use for the plumbing setup. The content often entails a new pipe system or other fixtures. Either way, a permanent solution is much better than resorting to plumber’s putty. Contact us today for help with any plumbing issue.


November 20, 2019by Lasiter & Lasiter

Showerhead

Finding the Right Shower Head For Your Bathroom

Did you know that you can save lots of money by replacing the shower heads in your bathrooms? We want to arm you with this knowledge. Multiple factors will go into the quality of your shower head.

The more features will likely mean a more significant investment. Below are some other things to consider.

How Is It Designed?

A shower head may come with a wall-mounted design. But you can also find some hand-held models that you can use with an attached hose. A ceiling-based model will be affixed to an arm and will position itself directly in the middle part of your shower area.

What Is the Pressure Level?

The water pressure should be from 40 to 60 psi. The good news is that today’s showerheads can work with less. You won’t use as much water thanks to this, thus helping you save money.

How Much Is Water Used?

Factor in the amount of water your showerhead will use monthly. The good news is that today’s showerheads use less water than older models.

You should use a WaterSense-certified model that uses less than two gallons of water per minute. The standard is for quality shower heads that aren’t going to make you use more water than what you can afford, so be sure you look at how well your shower head model works in this case.

How Does the Spray Work?

The spray feature on your shower head should emit water in a way that’s comfortable for your use. A spray may be extensive, but it can also entail a targeted approach that shoots water in smaller nozzles but at a harder rate.

A rinse option will emit water through a central nose for a gentle dousing. A pulsating unit would use alternating patterns. Each option has a different experience to note, so look at how well you’re finding something that fits your usage desires.

Review the Appearance

You should be sure that the appearance of your shower head is one that you like. The presentation should be something that is comfortable and offers a good look in your shower. You have to look for something that is enticing and makes your shower more inviting. You need to produce a good experience when showering, so you should look well at how you’re finding something that fits in well in your home.

The showerhead you use is essential. Contact us today with any plumbing service needs!


November 14, 2019by Lasiter & Lasiter

Drain Water Tank

Draining Water From Your Water Tank

The water tank in your home can be critical for ensuring you have enough water on hand for many intentions. But you have to watch for the sediment that can build up on the inside. The buildup can be painful for many purposes, but it especially becomes an issue for heating purposes after a while.

Filteration System

While your filtration system will clear that material out, it will still stay in the water tank. The buildup makes it harder for your container to remain as functional as it should.

The sediment may also prevent heat transfer from working. Your unit becomes less effective due to that limit. You will have to remove the deposit to make it easier to receive the warm water your home needs.

Steps to Cleaning Out Your Tank

You can drain the water from your water tank every few months to make it easier for your model to function. There are a few steps you’ll have to follow to help you with cleaning everything out:

  1. The power or gas to the heater needs to be shut off.
  2. Shut off the cold water supply valve. The water should stop flowing into the tank at this point.
  3. Attach a garden hose to the drain valve. The valve should be at the bottom part of the tank.
  4. Move the hose outside your home.
  5. Open the pressure relief valve. The valve should be on the top part of the tank. You might have to pull on the unit.
  6. Let the water inside the tank drain out. The step might take a bit depending on the size of the tank and how much water was inside.
  7. After emptying the tank, apply the cold water valve for a few minutes. You can do this to flush out the remaining sediment on the inside.
  8. Close the drain valve and pressure relief valve.
  9. Let the tank fill up once again.
  10. Turn the hot water setup on your tank once again. You might have to reignite a pilot light if you have a gas-powered water tank. For an electric model, you would have to flip a breaker to get the power back to the heater.

The process should not take long, but it does require plenty of materials. The good news is that you only need to do it every so often.

Call the Fort Worth Plumbing Experts

Removing the sediment from your water tank and the heater is critical. You can ask us at Lasiter and Lasiter Plumbing if you require any additional help with fixing your heater and with removing sediment.


ABOUT

Lasiter & Lasiter Plumbing

For more than 45 years, we’ve been serving Dallas – Fort Worth and surrounding communities with outstanding workmanship and high-quality plumbing services, at affordable prices, on each and every service call.

TX Master Plumbers Lic#: M-8331
DALLAS – FORT WORTH’S

Trusted Plumber


FOLLOW US

On Social Media

Stay up to date on the latest plumbing and maintenance tips along with our special offers!


Copyright © 2020 Lasiter and Lasiter Plumbing | All Rights Reserved

Website Design by ProV3 Media